How to Create a Brunch Style Charcuterie Display: Bridal Shower Edition

Recently one of my best friends and I hosted a bridal shower. It was late February but we really wanted to bring in a fresh, spring vibe for our bride who loves brunch, flowers, and mimosas! This idea developed into an artistic display that we couldn’t have been more proud of. And the good news is that you can do it too! I’m going to outline the steps and give you my pointers for how to create this brunch display for your own party!
Pick your Theme
First off, pick your theme! This bridal shower was focused on a brunch theme. This made it easy to incorporate brunch style food. However, you can do this same type of brunch display with other themes by incorporating the themes elements throughout. For example, maybe you add some frames with your theme elements, etc.
Our invitations had little lemons on them which made it easy to incorporate a lot of open faced citrus. Whatever your theme may be, it will be easy to add different elements throughout this food display.
Pick your Anchors
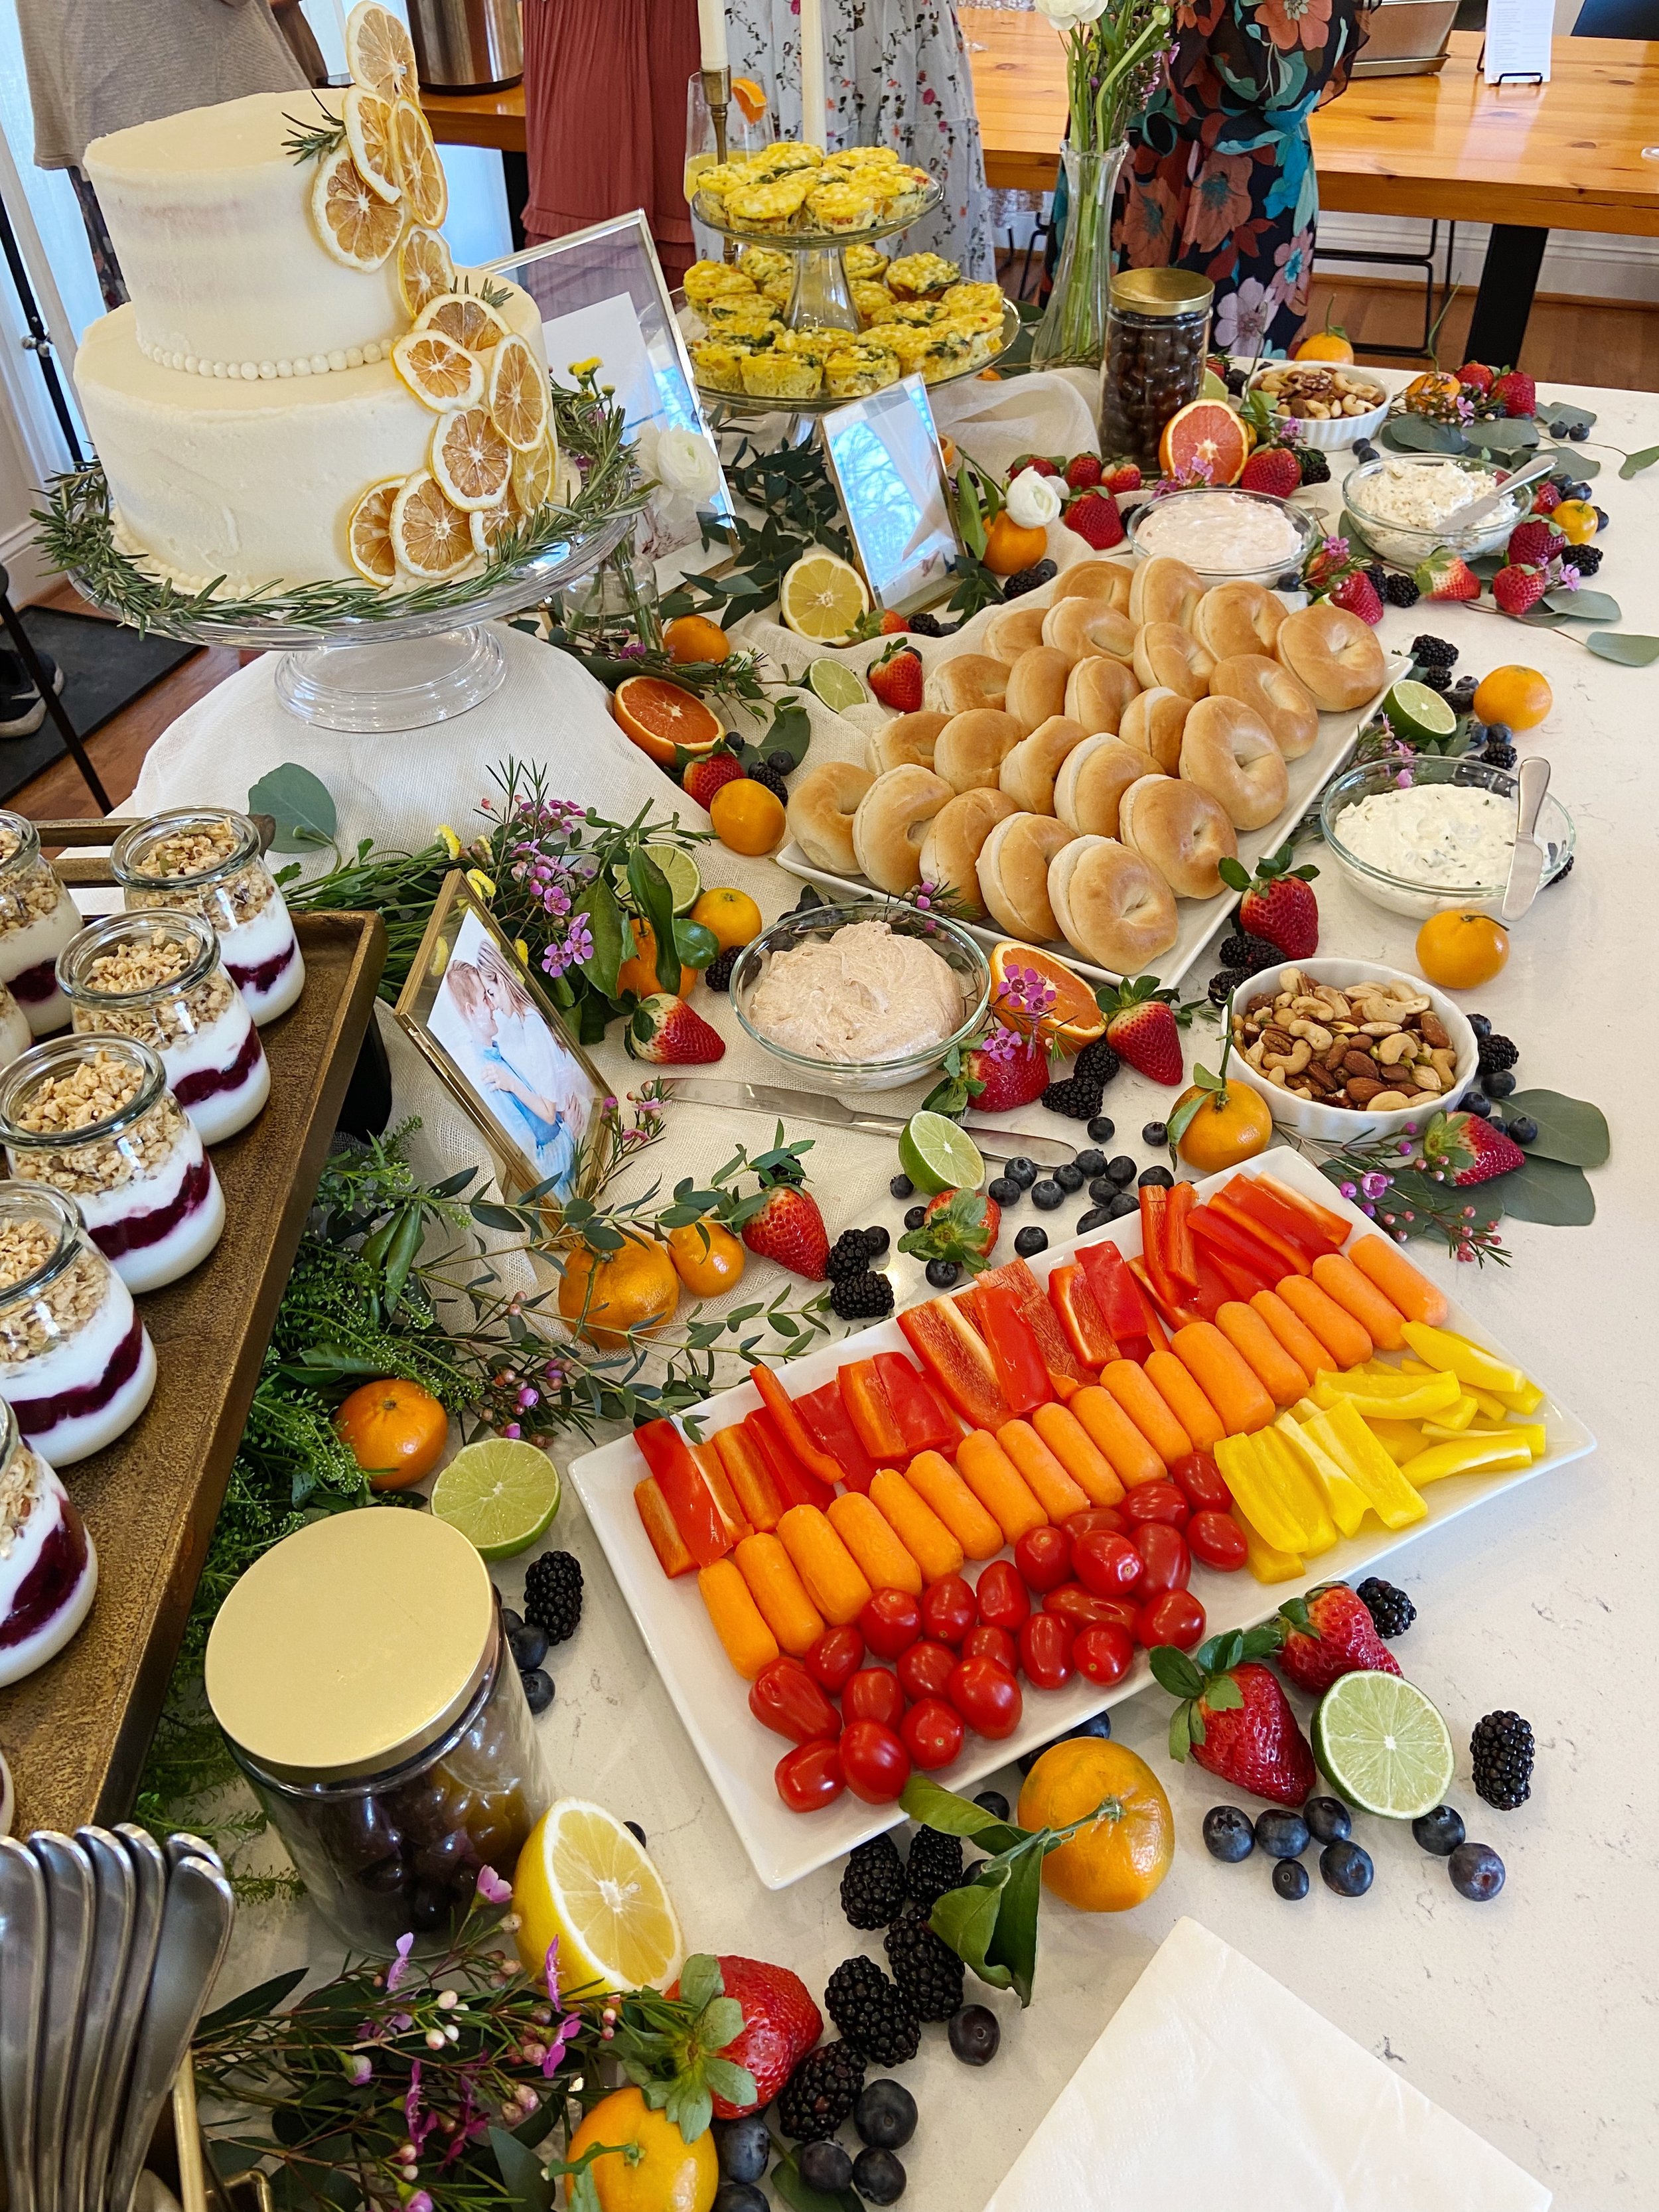
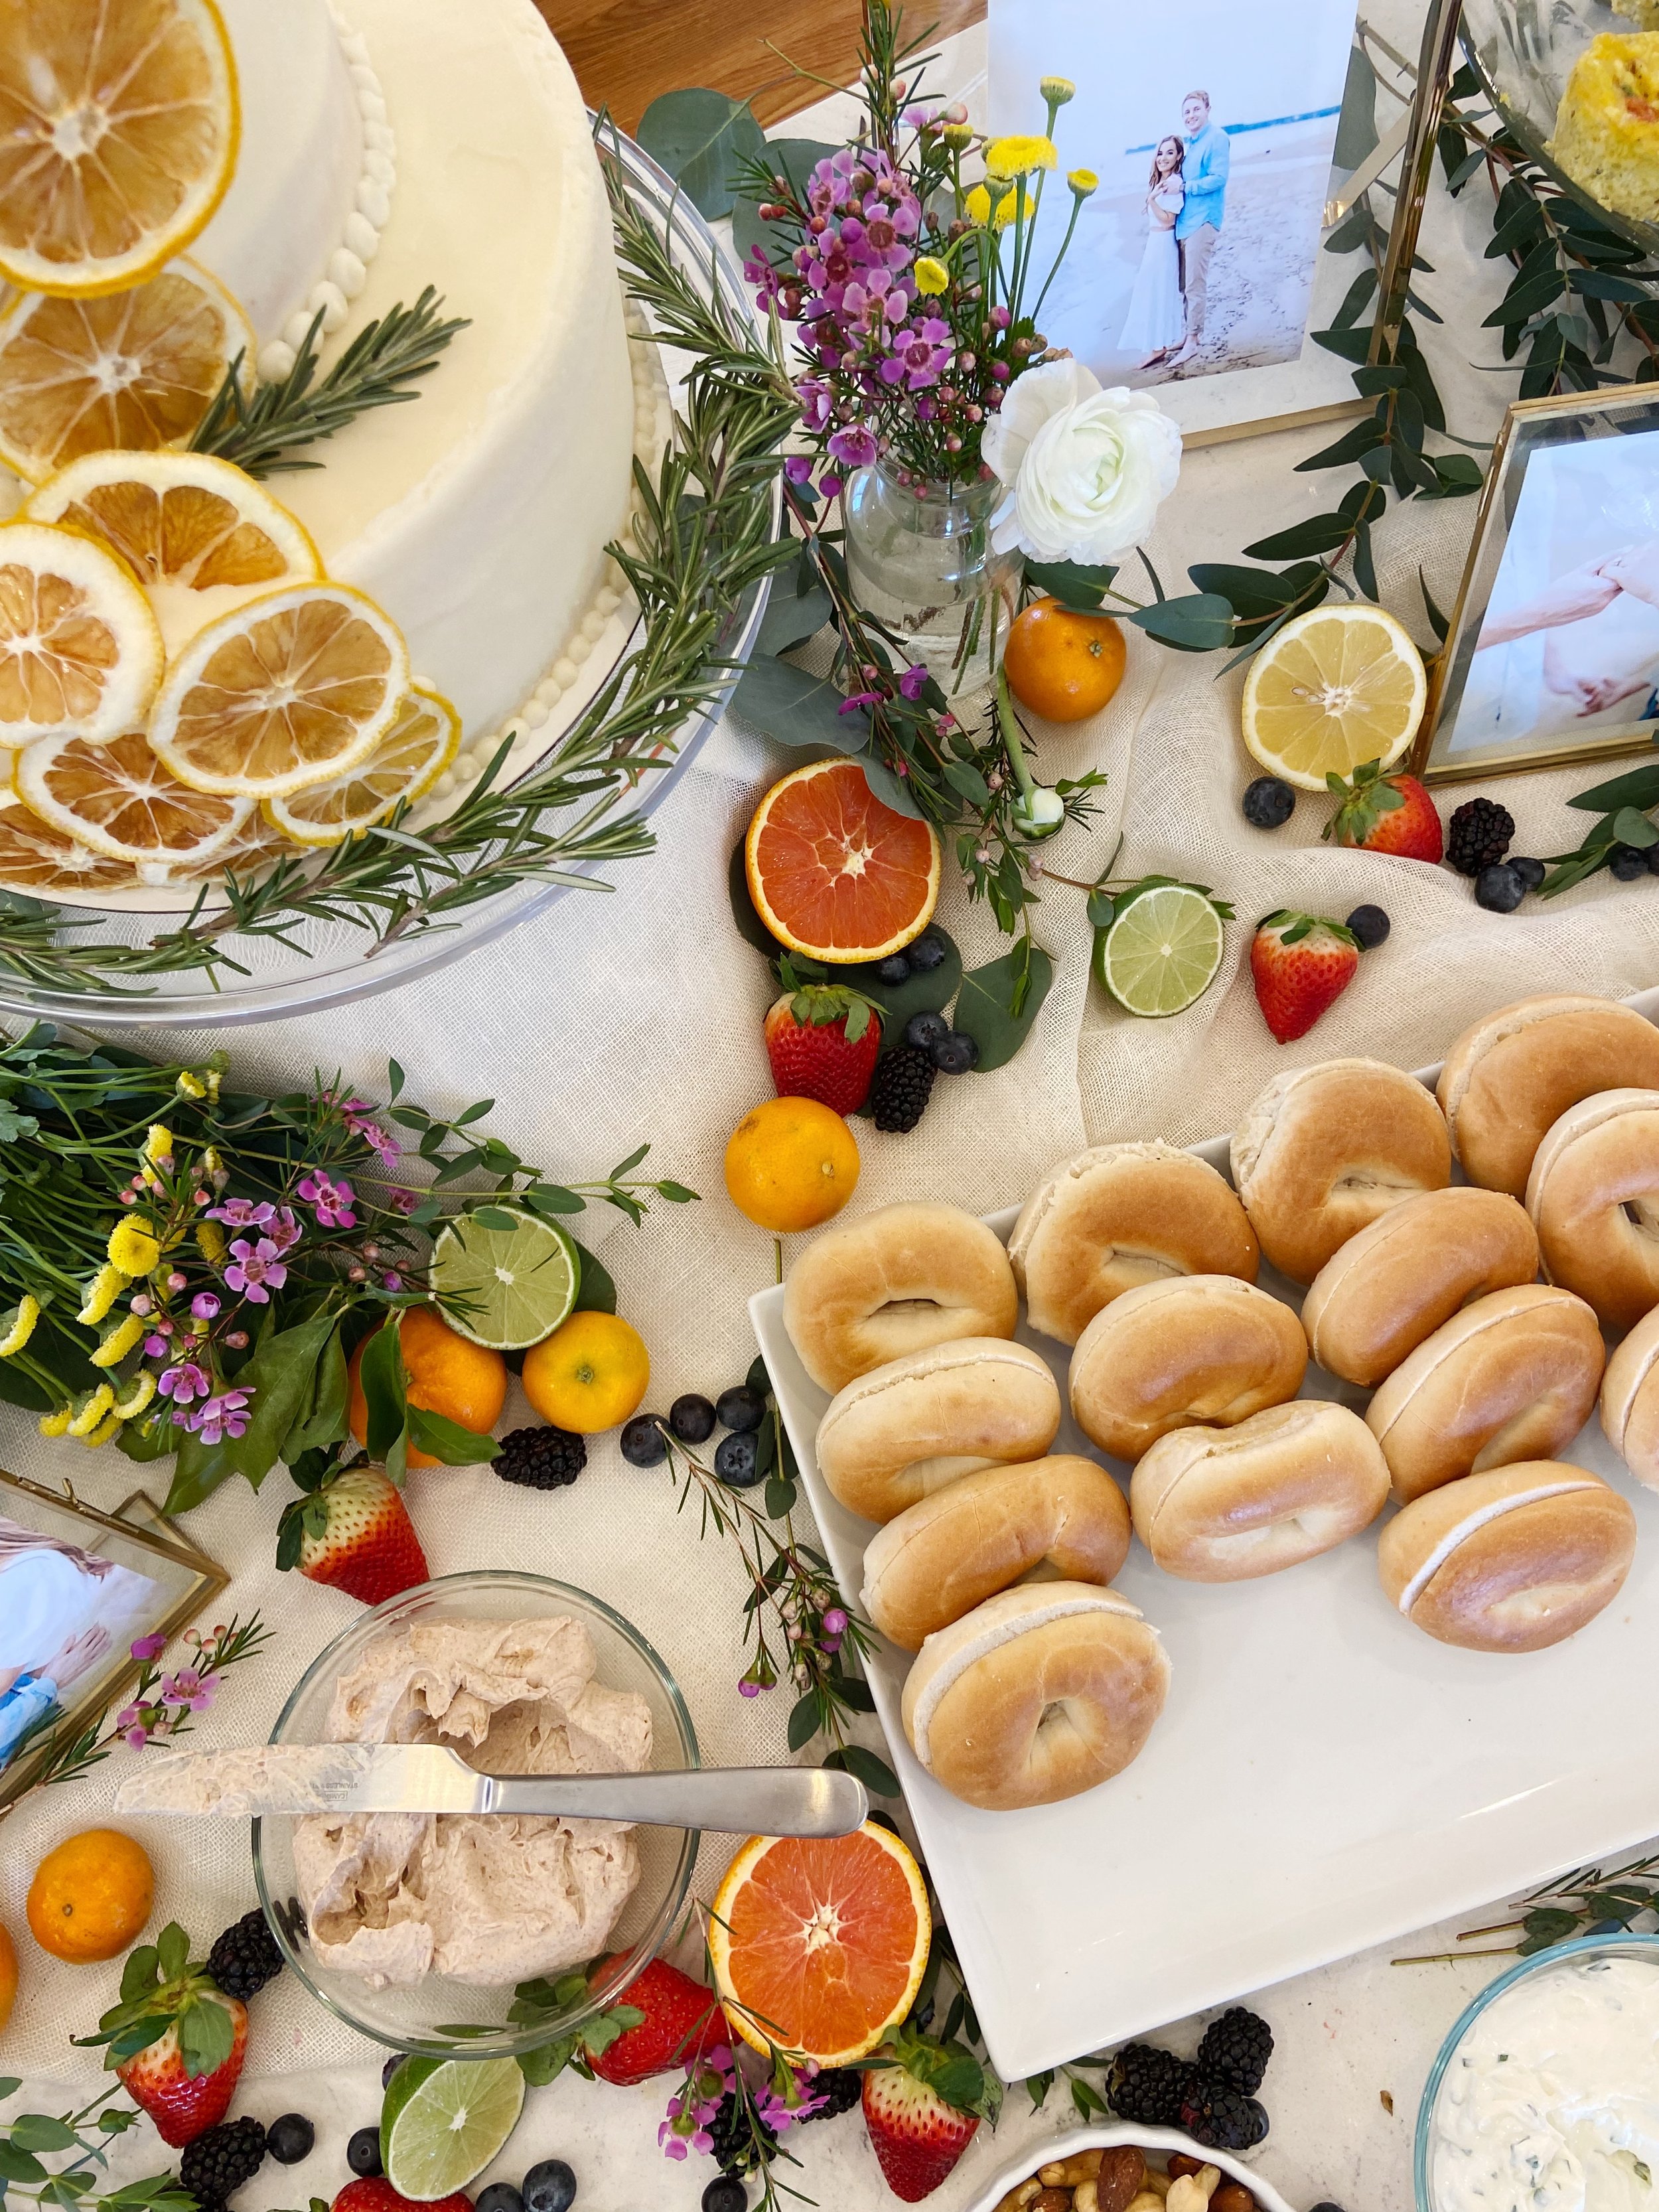
This brunch display was made very similarly to how you would create a giant charcuterie board. When you start a charcuterie board, you create several anchors or moments. This can be a bowl, big blocks of cheese, etc. For this display, we focused on platters that would hold our menu items and built around that. We made sure to incorporate height with our anchor points, especially in the back of the display to create some perspective. For us, this was 1) Our parfait bar, elevated on a platter that was built up with a metal box, 2) Our cake which was elevated on a cake stand sitting on an upside down bowl, and 3) a double decked cake stand that would hold our egg bites. We then added several other anchor points on the main counter that would hold things like veggies and bagels.
Add the Large Greenery & Fabric
Now that you have your major anchor points, you want to start laying down your fabric layers and greenery to the base of the display. We used a cheesecloth material to hide some of the bases and add some extra texture. This fabric was laid from one side of the display to the other in different places to add variety. Next, you’ll want to add some of your larger greenery to the display and place your platters overtop of these. You will build the smaller flowers, citrus, and fruit later, so just focus on the larger pieces of greenery for this stage.
Add Moments
Adding separate moments throughout can be anything from candles, to frames. In our case, we used little flower vases, frames, and tall candle sticks to create little pockets of beautiful design. This creates other focal points and adds variety to the display. When you look at the photo above, you can see the frames were offset, followed by the candles, and then the little flower vases.
Add the Food
Next, you’ll want to add the food to the platters. This allows you to visualize the different colors on the display and where you need to add extra color and interest. This was really helpful particularly because we had glass jars filled with dark red fruit, egg bites that were bright yellow, and bagels which were a soft beige. We also had smaller bowls for different flavored cream cheese and nuts, chocolates, etc.
Add the Citrus, Fruit, and Flowers
My personal favorite part! This is such a fun stage because it all starts to come together! For ease, I would have a separate “staging” station where you can pull your materials and transfer them to the display. This helps you visualize what you have and see where you need to place something on the display. We used these items, in this order:
Greenery
Flowers
Citrus cut open
Mandarine Oranges with the stems attached
Berries
When you start with the greenery and work your way down the list through the smaller items, it really helps everything build onto one another. There is no method on how to place these items, other than what looks the most visually appealing to you. My favorite part was sprinkling blueberry over everything at the end. They add great color and fill in all the small spots. Have fun with it!
Our Menu
Our menu consisted of Egg Bites, Yogurt Parfaits in cute glass jars (linked here!), a lemon cake made by yours truly (me!), mini bagels with 4 types of cream cheese, a veggie tray, and then lots of fruit scattered throughout for nibbling. Additionally, we had a “Build your own Mimosa” bar on a separate table with little orange slices fixed on the glasses.
Cream cheese flavors:

Cinnamon and honey (mixed in cinnamon and honey)
Garlic and chive (chives and minced garlic)
Everything seasoning (the seasoning from Trader Joes mixed into the cream cheese)
Strawberry (mixed in strawberry preserves)
That’s a Wrap!
I hope this blog post helps you create your own unique brunch style display for your own party! If you have any questions at all, please feel free to contact me at [email protected]!